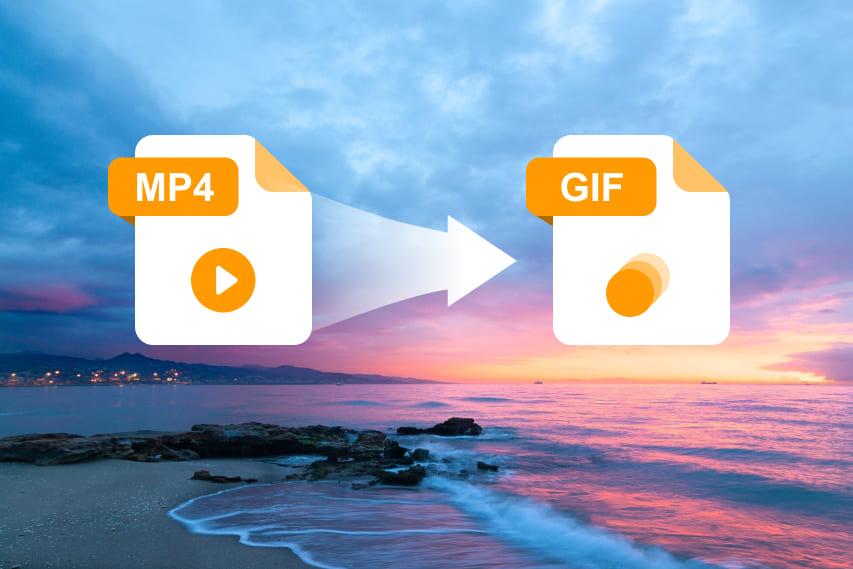
Can I Make GIFs from MP4 Video
Before diving into the methods, it’s essential to address the fundamental question: Can you make GIFs from MP4 videos? The answer is a resounding yes. MP4 to GIF conversion allows users to extract short, looping animations from longer videos, enabling easy sharing on social media, messaging platforms, or websites.
How to Convert MP4 to GIF in Kapwing
Kapwing Convert Tool stands out as a user-friendly online platform that simplifies the MP4 to GIF conversion process. To get started, visit the Kapwing website and follow these steps:
Step 1. Click “Create new” to upload your MP4 file to the Kapwing Studio. Use the timeline to select the desired portion of the video.

Step 2. Customize the GIF by adding text, filters, or adjusting the duration. Click “Create” and wait for the platform to process your GIF.
Step 3. Download the final GIF or share it directly.
Pros:
- User-friendly interface.
- No software installation required.
- Additional editing features for customization.
Cons:
- Internet connection needed.
- Limited to basic editing options.
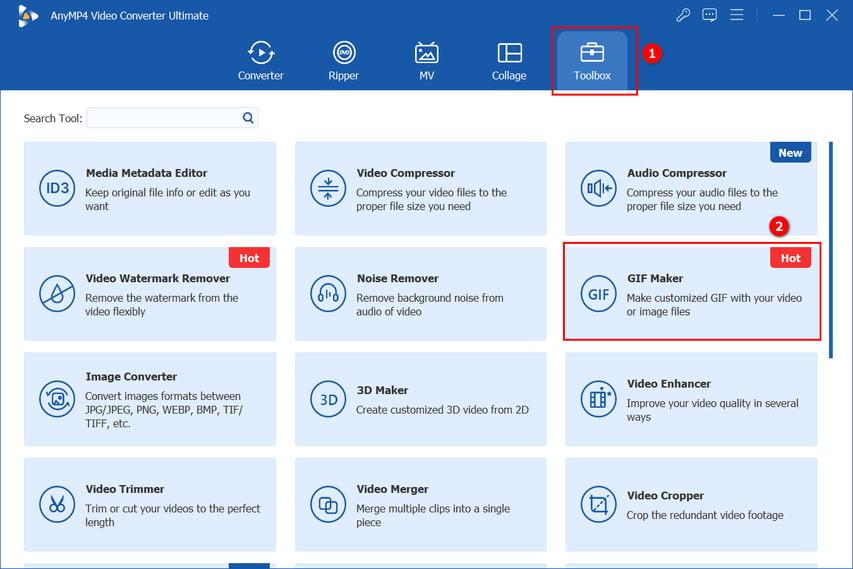
How to Convert MP4 to GIF in AnyMP4 Video Converter Ultimate
AnyMP4 Video Converter Ultimate, another best MP4 converter on the list, offers a more robust MP4 to GIF conversion solution with advanced features. It has many editing functions after conversion, making your videos more customized and professional. It is compatible with both Windows and Mac and can convert 5K, 8K, and Ultra HD with high-quality videos.
You Follow these steps to design your GIFs from MP4 videos:
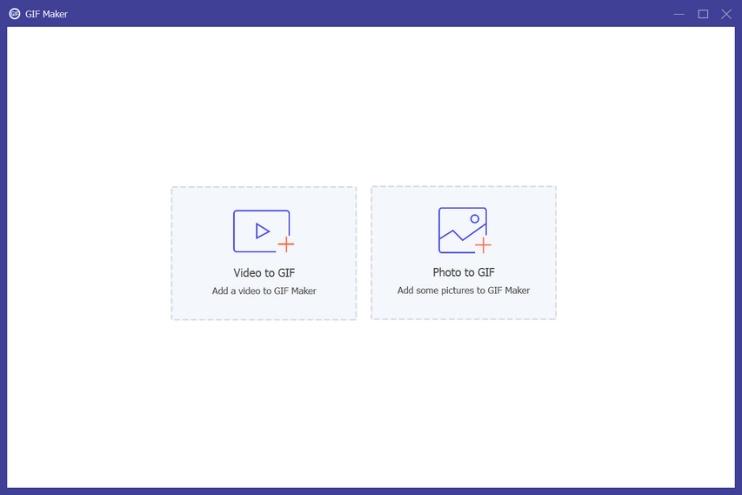
Step 1. Visit the official website and install AnyMP4 Video Converter Ultimate. Double-click to open the software. Locate Toolbox and choose the GIF Maker.
Step 2. Import your MP4 file into the software. You can make settings such as resolution, frame rate, and quality.
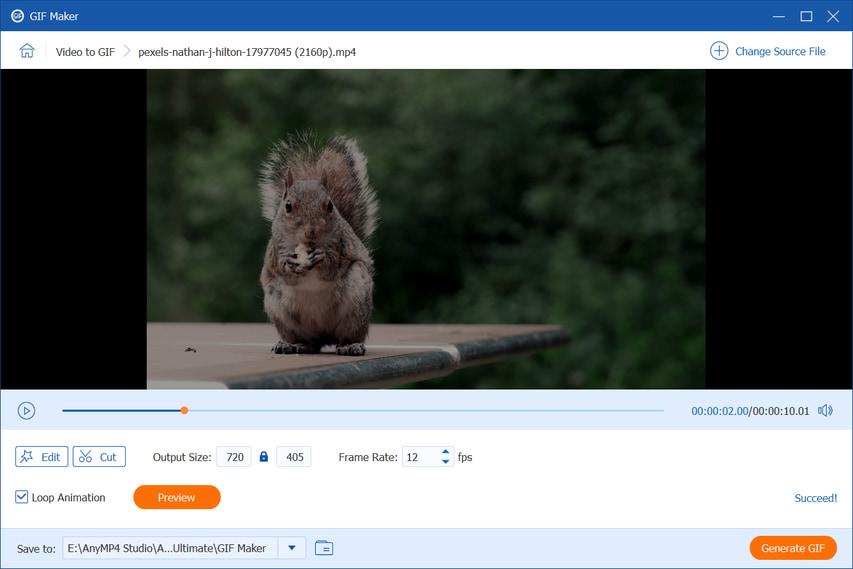
Step 3. After all settings are done, click “Generate GIF” to start the conversion process. You will get a GIF from the video in seconds.

Pros:
- High-quality output with advanced settings.
- Batch processing for multiple file conversions.
- Support for various input and output formats.
Cons:
- Software installation required.
How to convert MP4 to GIF in Aiseesoft GIF Maker
Aiseesoft GIF Maker is another dedicated tool for GIF creation. It is a powerful tool within the Aiseesoft Video Converter Ultimate. Equipped with the graphics card level, it utilizes advanced encoding technology and is capable of delivering the best image quality. Making GIFs is only one of its powerful editing functions, and it can also rotate, flip, crop, trim, merge, etc.
You can follow the below steps to convert your MP4 to GIF using Aiseesoft:
Step 1. Install Aiseesoft Video Converter Ultimate on the official website and launch Aiseesoft GIF Maker.
Step 2. Import your MP4 video.
Step 3. Set the start and end times for the GIF. Adjust settings like frame rate and size.
Step 4. Click “Create GIF” to initiate the conversion. And you can get your desired GIFs in seconds.
Pros:
- Intuitive user interface.
- Precise control over GIF creation.
- Preview feature for real-time adjustments.
Cons:
- Software installation required.
How to convert MP4 to GIF in Adobe Photoshop
Adobe Photoshop serves as a professional graphic design software developed by Adobe Inc. It is widely used for various tasks, including photo editing, digital art creation, and, in this case, converting videos to GIFs. Photoshop offers a powerful suite of tools and features, making it a versatile choice for creative professionals.
You can follow the steps to make GIF in Adobe Photoshop:
Step 1. Open Adobe Photoshop. Go to “File” “New” to create a new project. Set the width, height, and other settings for your project. Click “OK” to make the canvas.
Step 2. Navigate to “File,” “Import,” and “Video Frames to Layers.” Choose your MP4 file and click “Import.”
Step 3. In the dialog box, set the range of frames you want to include in your GIF and specify the frame rate. Click “OK” to proceed.
Step 4. Open the Timeline panel by locating “Window” “Timeline.” This panel will display the frames from your video.
Step 5. Go to “File,” “Export”, and “Save for Web.” In the “Save for Web” window, select “GIF” as the output format from the drop-down menu.
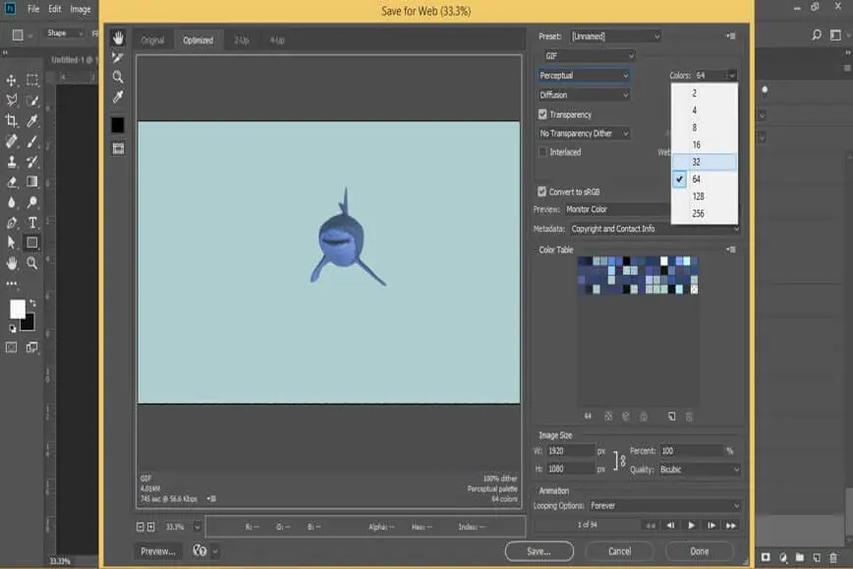
Step 6. Customize settings such as color palette, dithering, and image size to optimize the GIF. Use the preview option to see how changes affect the final result. Click the “Save” button, choose a location to save the GIF, and specify a file name. Click “Save” again in the Save Optimized As window.
Pros:
- Advanced editing tools.
- High professionalism with complicated features.
- High level of customization.
Cons:
- High learning curve.
- Resource intensive and may slow down your computer.
Conclusion
In conclusion, converting MP4 to GIF leads you to a world of creative possibilities, which allows users to share engaging and dynamic content effortlessly. The selection of tools varies based on individual preferences, ranging from AnyMP4 Video Converter Ultimate to Aiseesoft GIF Maker. Whether you prioritize user-friendly interfaces, advanced customization options, or high-quality output, there’s a tool for every need. Experiment with different tools to find the one that best suits your preferences and workflow, and let your creativity shine through the captivating world of GIFs.